Highlight of this article:
- Do I need to cover Microgreen seeds after sow?
- The Weight-On-Top technique of growing Microgreen
- The Black Out technique of growing Microgreen
In the first episode, we asked you to save at least two trays to grow microgreen, you will find out why in this article. Let us jump into the tips right away, and let us take you through the theory behind them!
Tips 1:Weight-On-Top Technique
During the seeding process, we often ask our gardeners to cover seeds with soil at approximately 2 times the diameter of a seed. The purpose of this is to:
- Ensure water retention by surrounding seeds with moistened growing medium
- Ensure seeds are firmly seated so that roots will grab the soil firmly later
With Microgreen, we consume their cotelydon, or cotelydon with the first pair of true leaf, thus we don't usually cover the seeds while sowing (Apart from species that comes in wrinkled seeds, such as Swiss Chard or Nasturtium). But this leads to another problem —— the seeds may dry out in its germination process. Drying out will slow down seed germination, also leading to non-uniform harvest, which is rather crucial to Microgreen harvest. To avoid seeds drying out, after sowing seeds on a soil bed with <5cm depth, we can place another identical tray on top of the seeding tray, then put extra weight on top accordingly (Image below):
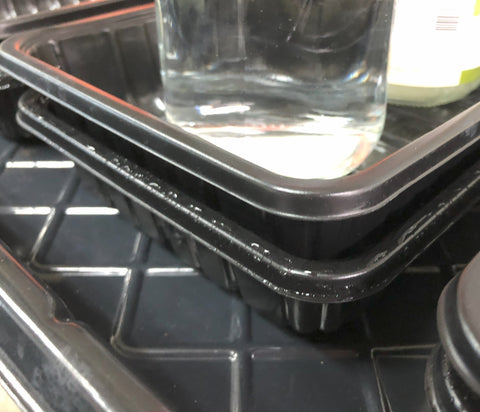
Using an identical tray to cover the seeding tray in this way, and place bricks, rocks, or water bottle for extra weight on top, but remember to place weight evenly on surface
If you cannot place an extra weight on top, we recommend you to at least adding the cover with another tray, to avoid drying out of the seeds. For seeds that are small and softer, such as Amaranthus, Basil, Lemon Basil, or Cress, they enjoy less weight on top, so a tray only is enough for them. An extra benefit of adding an identical tray is that the tray will stick away some nutshell, so it makes it easier for harvest too.
Amaranthus, Basil, Lemon Basil, or Cress seeds are smaller and softer, they enjoy less weight on top, so a tray only is enough
Now, we also suggested that your trays should be opague. Why? Find out from our next tips!
Tips 2:Black Out Technique
This is probably the concept that is most different from growing other plants.
As gardeners we do not want any leggy seedlings, which is caused by lack of sunlight. With Microgreens, in order to make harvesting of cotelydon and first set of true leaves easier, we deliberately create leggy seedlings with a technique called Black Out.
Timing is the most important. Let us explain this by showing you the images of the process.
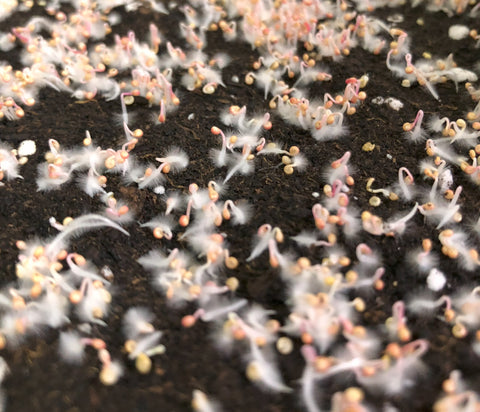
1. When you see the root hair starting to form, you can start the Black Out process

2. The easiest way to do Black Out, is to reverse the tray on top as a lid, creating a micro dark environment for your Microgreens
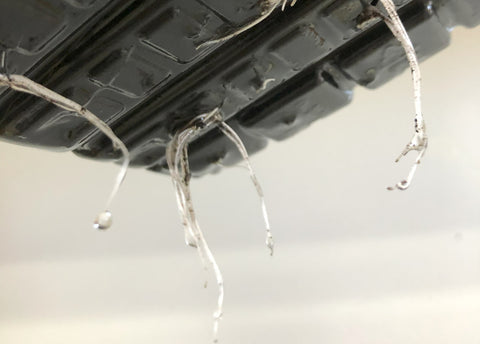
3. When your Microgreen enter the process of Black Out, it is high possible that it is also time for you to start bottom-watering. You will see roots starting to come out from drainage point of seeding tray, and the white roots are the evident of a healthy plant. To understand the principles of watering, check out our first episode of this series
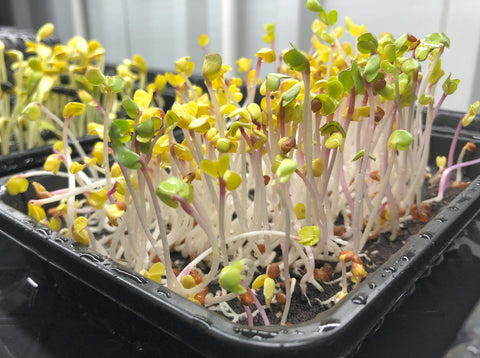
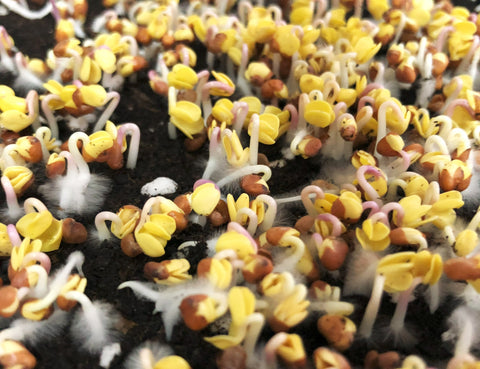
4. When your Microgreen reaches the expected height, you can remove the lid to end the Black Out process. Bringing back the light will allow photosynthesis, and your Microgreen will return to its colour
To conclude
We know the process may sound complicated, but don't get overwhelmed!
After growing Microgreen yourself for 2 to 3 times, you will know how to observe and do the process above naturally. Now that you got the tips, it is only about watering the right way, which is in this article.
Below is a table details on soil on top, Weight-On-Top days and Black Out days for each Microgreen varieties. Taking reference is useful, but ultimately they are affected by the temperature, humidity, and the condition of each batch of seeds. So as we said, the most important is to OBSERVE, OBSERVE and OBSERVE!
| Varieties | Soil on top | Days of Weight On Top |
Days of |
| Amaranthus No.4 | No | Tray only = 3 Days | 2 Days |
| Lemon Basil | No | Tray only = 3 Days | 3 Days |
| Sweet Basil | No | Tray only = 3 Days | 3 Days |
| Thai Basil | No | Tray only = 3 Days | 3 Days |
| Cress | No | Tray only = 2 Days | 2 Days |
| Kale - Kale No.1 | No | 3 Days | 2 Days |
| Kale - Kalebration mix | No | 3 Days | 2 Days |
| Mustard - Fringed | No | 3 Days | 2 Days |
| Mustard - Red Giant | No | 3 Days | 2 Days |
| Mizuna - Red Empire | No | 3 Days | 2 Days |
| Mizuna - Red Knight | No | 3 Days | 2 Days |
| Nasturtium No.1 | Yes | 0 Days | 0 Days |
| Pea No.21 | No | 3 Days | 2 Days |
| Radish - No.31 | No | 3 Days | 1 Day |
| Rocket - Salad | No | 3 Days | 2 Days |
| Sage | No | 3 Days | 2 Days |
| Swiss Chard Rainbow | Yes | 8 Days | 3 Days |
| Swiss Chard Red | Yes | 8 Days | 3 Days |
| Sunflower No.1 | No | 5 Days | 2 Days |
In the next episode, we will looking into problems of mold that is very common with Microgreen. Stay tuned with us!